Why install a modern stove
A modern high temperature combustion stove performs considerably better than an old fashioned cast iron stove, and dramatically much better than any open fireplace. The amount of fuel used and the levels of emissions are reduced at the same time as the heat output is increased. If bio-energy such as wood or pellets are used it is considered a completely “green” form of heat.
A “low-tech” and economical and durable system for a low-energy house could be a good stove together with a heat-recovery-ventilation system. The ventilation system would indirectly distribute the heat from the stove around the entire house.
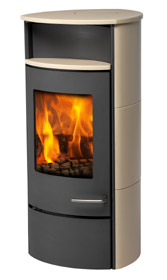
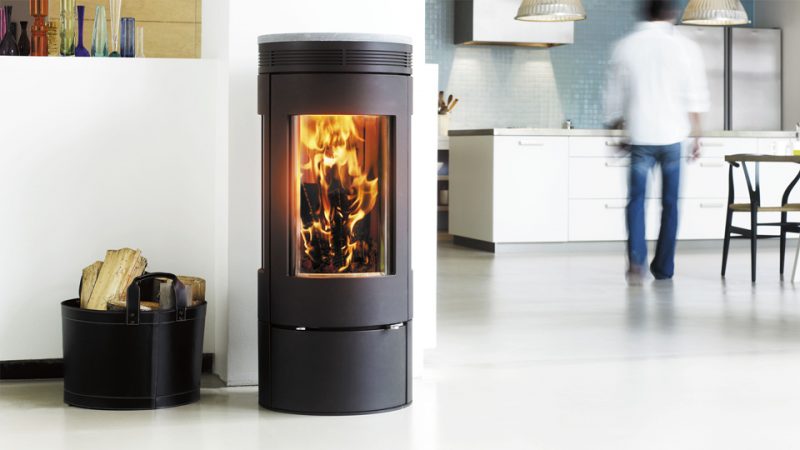
A wood-burning stove is a highly visible furnishing element with several functions so it is important to take the many aspects into account when investing in a source of heat for your home. The interior of the stove reflects Jydepejsen’s long experience in achieving perfect combustion and heat distribution. Of the several important factors, the key points are:
The fire box
The heart of the stove is the firebox, with its base of special cast iron, with the ability to tolerate extremely high temperatures. The sides are clad in vermiculite panels, which sustain flame impact up to 1100°C. The vermiculite panels insulate the firebox, giving a higher combustion temperature, better carbonization of the wood and higher efficiency. The high insulation effect makes it possible to control heat distribution.

Primary air
When lighting the stove, primary air is fed in under the grate. In this phase the fire needs air from below in order to catch quickly. Primary air is only introduced in the lighting phase and is subsequently shut off.
Secondary/pre-heated air
Once the fire is well lit, combustion is controlled by secondary air. This air enters via two ducts alongside the firebox, where it is heated to approx. 350-450°C before reaching the fire. The combination of preheated air and insulation of the firebox with vermiculite panels produces an extremely high combustion temperature.
Adjustment
Once the flames have died down, air intake is reduced to a minimum. This is done very simply, either manually or by remote control. The very high temperature in the firebox causes the gases in the wood to ignite, thus achieving perfect combustion.
Convection
The stationary air between the inner and outer stove starts to move as the temperature in the stove rises. The heated air is forced out of the convection holes on top of the stove and at the same time cool air is drawn in at floor level. This airflow continues as long as the stove is hot, bringing about a substantial reduction in radiant heat and a distribution of heat round your home.
Sensible wood burning
When dry wood is burned in a wood-burning stove the following process occurs over a period of circa 1 hour: After being ignited the log dries out and heats up. After drying, the temperature of the wood rises so much, (150-200°C) that it is converted into volatile gases and charcoal. As the wood is gasified, a certain portion of the gases produced burn, and are converted into carbon dioxide and water. During this phase the temperature rises to around 600-800°C and a large supply of air is required. If the air supply is accidentally reduced, the flames will be smothered, but this will not stop the conversion of the wood into gas. The unburned gas will then flow out into the chimney, causing a nuisance outdoors and build up of tarry soot. Next the charcoal will burn, which requires very little air supply. Finally, new wood must be laid on the glowing charcoal cinders. Warning: It is important to ensure that you do not overheat your stove, as this can cause irreparable damage. This kind of damage is not covered by the warranty. Extremely high combustion temperatures can occur when using very dry fuel, such as kiln dried wood, coal, compressed fuel or pellets.
Incorrect wood burning
Too much air supplied to the combustion process causes an uncontrollable fire that will heat the entire stove very rapidly to an extremely high temperature. This can happen if you fire with: Open ash-pan or open air vent in weather conditions that produce an extra-strong draught in the chimney.
Never fill the stove completely with wood. It is better to heat a stove up slowly. This will prevent cracked tiles/soapstone, damage to welds and annealing of the iron. Overfilling the firebox also substantially reduces the useful life of the vermiculite panels, as cracks are more easily caused. Never ignite the fire at the top. Start slowly with a normal fire from the bottom, as any former Scout will know!
A little technical information about wood burning
1 kg of dry wood is made up of 20% water, with the remaining 80% divided into 60% gas and 20% charcoal. The 60% gas only contains around half the energy content of the wood, while the 20% charcoal contains the other half.
To achieve optimum combustion, the temperature must reach 600-800°C. It is best to add small quantities of wood frequently. If too much wood is laid on a layer of embers, the air supplied will not be sufficient to attain the required temperature, and the gases will disappear out through the chimney unburned. It is vital to supply air to the fire immediately after adding fuel, so there are flames in the firebox, and the gases burn. (See the operating instructions for your stove model for further guidance.) The quantity of firewood determines the heat emission – the more heat you require, the more wood you should add each time.
Types of fuel and heating values
Stoves from Jydepejsen are designed and approved for burning wood. Combustion involves conversion of the fuel from solid form into gases, water vapour and charcoal. The heating value is an expression of the content of combustible gases – stated in kcal/kg. All wood has roughly the same heating value per kilogram. The lighter the wood, the more that must be used to achieve the same heating value as with a heavier species of wood. As mentioned, air-dried wood contains around 20% water, corresponding to a heating value of approx. 4 kWh/kg equivalent to approx. 3440 kcal/kg (1kW = 860 kcal.) Source: Technological Institute, Denmark
Warning! Do not use impregnated wood, painted wood, laminated plastic, plywood, chipboard, refuse, milk cartons, printed matter or similar. Use of such materials will invalidate your warranty, as they may emit toxic, corrosive and hazardous fumes when burned. They may also cause a build-up of the toxic gas dioxin, which is damaging to the stove and the environment.
Recently felled wood contains 60-70% water and must therefore be seasoned before it can be used in a wood-burning stove. It must be sawn, chopped and air dried, and must contain no more than approx. 25% water before use. This equates to the wood being left in the open for approx. 1 year – covered only to protect against rain. In a wet climate like in Ireland the wood must be stored in a very well ventilated space under roof. It is very important to always use pure, dry wood. Damp wood requires a lot of air for combustion, as extra energy in the form of heat is needed to dry it out. Heat emission is therefore minimal. It also causes sooting up of the chimney, with a risk of tarry soot and chimney fire.
Combustion problems
Combustion problems can arise if the combustion conditions are not optimal. This can be corrected by following the advice given below.
Insufficient draught
-The flue vent is closed.
-The access hatch in the chimney is defective or missing.
-The chimney is blocked by a birds nest or similar.
-The flue pipe is sooted up, or there is an accumulation of soot on top of the baffle plate.
-The chimney is too small.
-The baffle plate may be positioned incorrectly.
-Negative pressure in the house.
-Open the flue vent.
-Contact your chimney sweeper/stove installer for further advice, or clean the flue pipe and firebox.
-Check the fitting of the baffle plate, see the operating instructions.
-In well-insulated buildings negative pressure can occur, increase the air supply to the room.
Too much draught
-The baffle plate may be positioned incorrectly.
-If using kiln-dried wood, this requires less air than normal wood.
-The air vent is constantly wide open.
-The sealing strips on the door are worn and pressed completely flat.
-The chimney is too large.
-Check the fitting of the baffle plate, see the operating instructions.
-Reduce the air supply.
-Check the sealing strips. If these are worn, replace them as described in the manual.
-Contact your chimney sweeper/stove installer for further advice.
White glass pane
-Poor combustion due to too low temperature in the stove.
-Incorrect combustion (burning painted wood, impregnated wood, laminated plastic, plywood or similar.)
-Follow the instructions for correct burning as specified in the manual.
-Ensure that you use pure, dry wood in your stove.
Smoke comes out into the room when the door is opened
-Pressure compensation is occurring in the firebox.
-The chimney is not a suitable size for the firebox.
-Open the air vent wide for about 1 min. before opening the door
-Avoid opening the door rapidly.
-Check the height of the chimney. It may be too short for the minimum draught required from the chimney.
Black glass pane
-The wood is too wet.
-The air vent is not sufficiently open.
-Dry wood with a maximum of 20% moisture should be used.
-The air vent must be opened to supply more air for combustion.
White smoke
-The combustion temperature is too low.
-The wood is too damp and contains water vapour.
-Increase the air supply.
-Always ensure that you use pure, dry wood in your stove.
Black smoke
-Incomplete combustion.
-Increase the air supply.
Lighting and burning problems are usually due to wet wood or insufficient draught.
HEAT DISTRIBUTION AND POSITIONING OF STOVE
All Jydepejsen stoves are of the two-in-one design. The inner unit is the actual stove constructed of heavy steel plate and the outer unit consists of steel facings, ceramic tiles or soapstone. Convection occurs within the intervening space between the two units. The air is drawn in from the bottom. The heated air rises and then begins to circulate first throughout the room and then to the adjacent rooms. This creates perfect heat distribution. Therefore it makes a difference where you position your stove in the house. The best is a central location from the rooms which you require most heat. Allow the doors to remain open so that the heat can be distributed throughout the house.
A MODERN CONVECTION STOVE
Steel plates are currently the most popular material for stoves. This has not always been the case. For many years, cast-iron was the traditional material. During the past 15 years, convection stoves have gained increasing popularity. One of the reasons for this success has been the comfortable heat distribution gained from the convection sides.
Combustion and pre-heated air
We apply a combustion technique with pre-heated airflow in all our stoves. This means that the air supply for combustion flows from the air valve and on through air ducts in the stove, which becomes warm when the stove is lit. This technique has shown to provide a completely new degree of clean combustion. This is due to the high combustion temperature attained within the high-insulation Vermiculite panelled combustion chamber. These factors, together with the extremely simple operation of our stoves, ensure that the preconditions exist for a correct combustion that is beneficial to both outdoor and indoor environments. There is continuous development of both combustion technique and stove design.
Prior to installation
Prior to installing your new stove, you must ensure that the chosen location complies with existing regulations. If the stove is to be positioned beside a stone wall there are no requirements for minimum distance. However, we recommend a rear distance of approximately 5-7cm to simplify cleaning.

Jydepejsen start box
In the combustion chamber of your new stove you will find a Jydepejsen startbox. This contains some accessories which will help you to get off to a good start. The startbox contains: Installation and firing manual, glove, spraypaint for touch-up and stove lighter
Before installing your stove
Before installing your new stove, make sure that the location complies with the applicable building regulations. See also operating instructions for information on minimum distance for from flammable materials. If the stove is to be installed close to a brick wall or other non-flammable material, there are no minimum distance requirements. However, we recommend at least 5-7cm at the rear for cleaning access. The stove can be connected to a conventional masonry chimney, a modern modular pumice type chimney, or to an insulated metal-flue duct. Consult with your builder/installer which type suits your situation the best.
Before initial lighting
Once your stove is in place and all instructions have been observed, it is ready for lighting up. However, please take careful note of the following:
The rear section tiles should be removed before the initial lighting up. A sudden temperature change could cause the tiles to crack. The tiles are not covered by the warranty, so ensure that they are at least at room temperature before lighting up. The baffle plate and vermiculite panels may crack under hard impact. These are not covered by the warranty, so avoid any heavy blows when placing wood in the firebox. Avoid touching the stove when initially lighting up, as the paint is hardening at this stage. Touching the paint may cause the steel to show through – if necessary, it can be retouched using the spray can included in the Jydepejsen start pack (see below). It is a good idea to ensure effective ventilation during the first use, as the stove will generate smoke and an odour of paint. Do not stay close to the stove. The smoke and paint odour will dissipate after about 1-hour of operation and is not hazardous to health. For correct lighting/burning of your stove refer to the operating instructions.
Practice makes perfect
Optimum regulation of the air-vent takes a little practice. Once you have had a bit of practice with lighting the stove you will develop a natural routine. The stove will expand and contract during the lighting and cooling phase, possibly resulting in creaking noises. This phenomenon is completely normal for sheet-iron stoves, and should not be regarded as a fault. Please read the operating instructions for further guidance.